Showing posts with label food. Show all posts

Sunday, August 21, 2011

Really Glad to Pop.

Click the above link to learn more.

After my last visit to Nickel Diner in Los Angeles,  I was obsessed about my incredible poptart that I had for dessert.  I vowed to make them at home and soon.  When I saw that Williams-Sonoma had a press, and that Dave and I were venturing that way for dinner and movie, I took the opportunity to pick one up and have some fun with it.

I used the recipe that came with the packaging.
Basically a pie crust dough with 2 tablespoons of sugar added.  The fillings you can use are endless, but I used a simple mixed berry jam.
I rolled the crust 1/8 of an inch thick, and then cut them with the wider cutter. Then I added one tablespoon of jam to the middle

I spread the jam to within 1/2 inch of the edges.

And used an egg wash on the edges.  I placed the tops onto the poptart and used the smaller part of the kit to "Press" the edges together.  I could have used a fork, but then I wouldn't have the crimped edges, and it would have taken longer to fork all the edges.


I used the egg wash on the tops and then baked them for 30 minutes, rotating 1/2 way though the time.
I iced them, fast cause Dave was snooping around all hungry-like, so they are not the neatest looking things.  The ones at Nickel Diner had the royal icing and sprinkles on them, and it blew them out of the water!  I will do that next time.  I am also going to experiment with fillings. These turned out really good, and everyone loved them.  Everyone being Jordan and Dave.

Friday, September 18, 2009

Pasta Caprese is Easy Peasy!!!

I know, I know, I was supposed to use my new skillet and post about it. But, I got carried away by this most awesome of awesome "almost no cook" pasta dish.

Do you have an excess of :
  • tomatoes?
  • belt holes in your belt?
  • taste buds that need exercise?
  • bored brain cells?
  • children who turn their nose up at anything?
If you answered yes to any of the above questions.....well then let's just get on with the fun!

Simply whisk together:
the juice from 2 lemons,
1/4 cup of Extra Virgin olive oil,
1 finely minced clove of garlic
And a minced shallot. Add some salt and pepper and then add 1 1/2 pounds of chopped fresh tomatoes to the vinaigrette.

Let these marinate for no more than 45 minutes at room temperature or until you complete the following:

Dice 12 ounces of FRESH mozzarella cheese. Put it on a plate and freeze for 10 minutes.
Cook 1 pound of tubular pasta, such as ziti, rigatoni, penne etc. in salted water. Drain, and add to the tomatoes, add the semi frozen cheese. Wait 5 minutes then stir in a handful of chopped fresh basil, adjust seasonings with salt, pepper, or sugar. EEEAATTT

The folks at Cook's Illustrated are responsible for my expanding waist line. They really are.

There is no excuse for my lack of a photo here. Except to say. We pigged out and ate this before we thought to photograph. Oink. Okay, I thought to photograph, but I didn't care, and I was afraid they would eat it all gone before I could snap the shot and claim my share.

Tuesday, September 01, 2009

Flat is Where it's AT

I rarely go out to eat as it is, so why not cook for my waistline?

Yes, you read it right. I rarely go out to eat. I just have a hard time finding really "foodie" type food in Provo. I picked up the Flat Belly Cookbook at Sam's Club last Friday and have cooked from it ever since for every single meal. I am on day 4 and I have lost an inch off my waist. My clothes fit better, and I do not feel deprived.


Now let me digress a bit. I like to eat things like Pesto, nuts, avocados, corn tortillas, eggs, hummus, beans, rice, salsa, Asian and Indian food, pasta, etc... I like ingredients like shallots, garlic, basil, goat cheese, edemame, olive oil, lemons etc. So as I read through this book in the store, I liked the recipes; all of my favorite ingredients were in there (A big fat missing ingredient is BUTTER, but ya gotta let something go) . I cook for a vegetarian, and there are many, many vegetarian recipes in there as well. For instance tomorrow's breakfast is Eggs Florentine with Sun-dried Tomato Pesto, turkey bacon (no bacon for Tiny) and fresh squeezed orange juice. It will be eaten with gusto after I get off my "machine".By the way I have estimated 3000+ miles on my machine. I love it.

So I am not on a diet!!! I am not on a diet!!! I am not on a diet!!! The minute my brain thinks I am on a diet-- I fail. I am just cooking from this new cookbook very regularly. If and when I need to eat chocolate covered cinnamon bears and movie theater popcorn, I will do so without hesitation.

Wednesday, June 24, 2009

Cooking Attempt


I just made Sopa de Fideos (a yummy lowfat Mexican pasta soup) for our lunch today. It was an exhausting procedure. In the normal world it would take 10 minutes to cook and prepare, and add in a 5 minute clean-up and voila, lunch.

In the Gimpy world, it took 20 minutes just to gather the ingredients, 10 minutes to prepare, no time at all to make a total mess everywhere, and a 1 1/2 hour nap between preparation and clean-up.

GOOD NEWS.....I haven't had to take a pain pill yet today!!!

Sopa de Fideos
2 tablespoons or less olive oil
1 small package of broken up vermicelli
1/2 small onion, finely chopped
1 clove garlic, minced
1 quart boiling water
1 can diced tomatoes, undrained
3 cubes Suisa (Knorr) chicken bouillion (chopped to a fine grit powder)

In olive oil on medium heat, in a large saucepan, pour in the uncooked vermicelli and stir fry it until it becomes a golden toasty color, add the onion, stir for about 2 minutes more, add the garlic, stir for 1 minute more. Add the boiling water, the canned tomatoes, and the bouillion. Bring back to a boil and cook for 2 minutes or until pasta is al dente. Serve immediately.

Saturday, May 16, 2009

Here's to a Great Saturday!

A person would have to have been living....in a cave (pun intended) not to have heard about Gollum and his "precious" ring.
Well kids, I too, have a "precious" . My precious camera has been returned to me whole and in perfect form. For some unknown reason, there were two screws loose...(hmmm, does that bring to mind any person you know?) inside the camera. While "precious" was being fixed, I crocheted a cover for my neck strap. It used to drive me insane because is was so rough and prickly. Now it is soft and cushioney.

Dave and Tiny were gone camping, and Jordan was in Idaho with a friend
so Malaina and I snuck off to see "Angels and Demons", with Tom Hanks.
We enjoyed it. It had been years since I read the book, so I couldn't remember who or what was happening.

Then we went for Indian food. Oh, it was fabulously good! But 'spensive!


My new favorite restaurant. Fabulous food, excellent service and ever so clean!!!

Saturday, February 21, 2009

Mexican Chicken and Corn Chowder

So how memorable is this recipe?

Dave recently requested this chowder twice in one week he loved it so much.
It really is easy to make with ingredients that are usually found around the house. I have added to it throughout the years only very minimally, by adding one can of whole kernel corn in addition to the can of creamed corn. This is a soupier chowder, un-thickened with flour.

Mexican Chicken and Corn Chowder
1/2 onion, chopped
1 clove garlic, chopped
2 tablespoons olive oil
1 1/2 pounds chicken breasts, cut into bite-size pieces
1 cup water
2 teaspoons chicken bouillon
1 teaspoon ground cumin
2 cups milk (I used a can of skim evaporated milk and part 1/2 and 1/2)
1 can each cream style corn, whole kernel corn
1 small can chopped green chilies ( I use fresh- frozen Hatch, N.M. chile and lots of it)
Optional Ingredients: Monterey Jack cheese, tomatoes, green onion, cilantro, corn chips etc.
(I do not think this chowder needs ANY of the optional ingredients)

In a large saucepan brown the chicken over medium high heat, add the onion and garlic, a bit of salt and pepper, saute a few minutes more. Add the water, bouillon, and cumin; bring to boil. Reduce heat and cover, and simmer for 10 minutes. Add milk, cans of corn, chilies and bring to a simmer and serve.

The inspiriation for this recipe comes from the USU Extension, Utah County Office, Newsletter Jan- February 2001. During the Malaysia/USA moving around I lost this recipe. Last year I went into the office and told them I needed to see every single blue newsletter for the past 10 years and they really helped me find it. Now the recipes are on line.

You can also check out what some other Weekend Cook Book Challenge bloggers love by clicking here.

Friday, January 23, 2009

Elitist Foodie Trend? You Decide

Did you see the article "No White House Food Fight"
in the special Inauguration issue of Newsweek this week? page 10, or link to it here.
Apparently she who's name must remain holy "Alice Waters" the mother pioneer of all that is Organic, "wrote an open letter to the president elect, suggesting that his eating habits could set an example for the country. Waters, along with Gourmet magazine's Ruth Reichl and New York restaurateur Danny Meyer, offered to serve as Obama's informal "kitchen cabinet.'" (Newsweek, pg 10)

A about spit my toothpaste all over my mirror as I was brushing and reading this article this morning. Has the foodie community really gained this much power that they think they can run the White House Kitchen? When did good taste buds, and a love of cooking become such an elitist profession/interest/hobby/talent? Some foodies are so self important now that they have almost taken over the organic, self sustained farming trend that is so popular now. Have you watched Tom Colicchio on the show Top Chef? Last week he was spouting how one of the chef's in question dishonored the lamb she was given by performing a bad butchering job. Hellowww, responsible hunters and Native Americans and housewives from yester-year have had this opinion long before you Mr C.. I am so sick of your shit Tom Colicchio. But, I'll be tuning in next week Wednesday channel 181 at 11:00pm!.

"Soon enough, big name candidates for the job as White House chef began to circulate" (read the article to see who was recommended). But gasp! Michelle Obama actually kept the Bush's chef!!!! SHE KEPT THE BUSH'S CHEF!!!!! Could this be? Did the Obama's offend the foodies? Offend the future "food cabinet" of America? Hah! But alas no...it seems that the Bush's have been eating green, and organic for years and years now. No changes in attitude were necessary in the Bush kitchen, there were no lessons or "examples" to make out of anyone and it appears as Newsweek so eloquently put, "the foodies had egg on their faces".

This trend has trickled down into the food blogging world too. I have noticed this when I visit other blogs that talk about food. One lady even put on her blog that she will review other food blog sites and if they fit her criteria (of which she listed) and if she deems them "worthwhile" she will link to our blog. There is a big long list of food sites I no longer visit because they have become so pretentious and elitist that I feel unwelcome even by the first sentence.

I harbor no hard feelings to elitist chefs and a few fellow food blogger elitists, oh excuse me, I am not an "official food blogger" since I also write about my life and other experiences. But I harbor no hard feelings just the same.

Friday, November 28, 2008

New Foods, New Men

A few new items were added to this year's line up of traditional Glad Family Thanksgiving Fixin's.
Susan's Cranberry Muffins. Thanks to my hairdresser for the recipe!

I did Pumpkin Créme Bruleé. It was really fun using the torch. My brother-in-law brought the pies. Oh, my they were wonderful.
My flowers were lovely. The photo looks like I went outdoors for it.
This is Jordan's boyfriend du jour. She really likes this one. I predict he lasts at least 2 more weeks; maybe through the Christmas season, since they have decided to buy gifts for each other.

Saturday, November 22, 2008

Japanese Beef Bowl--Gyudon

Yoshinoya is well known for its famous Beef Bowl. This is one of my family's all time favorite meals. Once you gather the supplies, this meal takes only a few minutes to prepare. If you live near any Asian market you can obtain these supplies. In Provo, Many Lands is the place.

The beef should be frozen first so you can slice is paper thin. You only need about 1 pound or less of meat. This steak has nice marbleizing. Pickled ginger really makes this meal a standout. Also I use short or medium grain rice that has been rinsed a time or two to make it stickier.

4 cups steamed Japanese Rice
1 pound paper thin sliced beef
1 onion sliced into thin wedges
1 1/3 cup dashi soup, I buy the granules and use 1/2 teaspoon in hot water
5 tablespoons Soy Sauce
3 Tablespoons Mirin
2 Tablespoons sugar
1 tsp. sake or sherry (opt.) but worth it
Put dashi, soy sauce, sugar, mirin and sake into a pot. Add onion slices, simmer for about 4 minutes. Add the beef to the pot, simmer only until the beef is cooked. About 3 minutes more. Remove from heat and serve over sticky rice. Garnish with the pickled ginger and the Nanami Togarashi chili seasoning if desired.
Posted by Picasa

Thursday, November 20, 2008

Almost No-Knead Bread


Okay, so I am a foodie. I cook, bake, eat and create. I sent Dave to the store last night so I could have the ale to make this bread. He bought this really fancy "boutique" beer. He had to buy the whole six pack when I only needed one can. He gave the cashier at Walker's the other 5 bottles of beer. Basically we paid 9 dollars for this bottle of Cutthroat Pale Ale. I should have read the recipe instructions more clearly; not until I looked at it further did I notice any old can of beer would do... even mild non-alchoholic beer. But, kids, the purpose of the beer is to get a really awesome crust, ahem...it is awesome indeed. I had enough beer to make 4 batches of bread.

The Cook's Illustrated recipe also calls for a 6 Qt Le Crueset Enamel Coated Cast Iron Dutch Oven. Mine below is only 2 quarts. I can't afford to run out and pay 280 dollars for a bigger pot.
So I remembered I had this old Pampered Chef La Cloche Baker, that did an equally stupendous job.


Almost No Knead Bread

Makes 1 large round loaf. Published January 1, 2008. From Cook's Illustrated.

An enameled cast-iron Dutch oven with a tight-fitting lid yields best results, but the recipe also works in a regular cast-iron Dutch oven or heavy stockpot. (See the related information in "Making Your Dutch Oven Safe for High-Heat Baking" for information on converting Dutch oven handles to work safely in a hot oven.) Use a mild-flavored lager, such as Budweiser (mild non-alcoholic lager also works). The bread is best eaten the day it is baked but can be wrapped in aluminum foil and stored in a cool, dry place for up to 2 days.

3

cups unbleached all-purpose flour (15 ounces), plus additional for dusting work surface

1/4

teaspoon instant or rapid-rise yeast

1 1/2

teaspoons table salt

3/4

cup plus 2 tablespoons water (7 ounces), at room temperature

1/4

cup plus 2 tablespoons mild-flavored lager (3 ounces)

1

tablespoon white vinegar

1. Whisk flour, yeast, and salt in large bowl. Add water, beer, and vinegar. Using rubber spatula, fold mixture, scraping up dry flour from bottom of bowl until shaggy ball forms. Cover bowl with plastic wrap and let sit at room temperature for 8 to 18 hours.

2. Lay 12- by 18-inch sheet of parchment paper inside 10-inch skillet and spray with nonstick cooking spray. Transfer dough to lightly floured work surface and knead 10 to 15 times. Shape dough into ball by pulling edges into middle. Transfer dough, seam-side down, to parchment-lined skillet and spray surface of dough with nonstick cooking spray. Cover loosely with plastic wrap and let rise at room temperature until dough has doubled in size and does not readily spring back when poked with finger, about 2 hours.

3. About 30 minutes before baking, adjust oven rack to lowest position, place 6- to 8-quart heavy-bottomed Dutch oven (with lid) on rack, and heat oven to 500 degrees. Lightly flour top of dough and, using razor blade or sharp knife, make one 6-inch-long, 1/2-inch-deep slit along top of dough. Carefully remove pot from oven and remove lid. Pick up dough by lifting parchment overhang and lower into pot (let any excess parchment hang over pot edge). Cover pot and place in oven. Reduce oven temperature to 425 degrees and bake covered for 30 minutes. Remove lid and continue to bake until loaf is deep brown and instant-read thermometer inserted into center registers 210 degrees, 20 to 30 minutes longer. Carefully remove bread from pot; transfer to wire rack and cool to room temperature, about 2 hours.

Just be sure to give some away...


Posted by Picasa

Wednesday, November 19, 2008

Cranberry Cream Scones

Greetings from Glad daughter #2..


When Malaina is not off on some adventure (here snorkeling off of Radang, Malaysia for a class trip) she is the Compassionate Service Leader in her Singles Ward. I have invited her to guest post her recent baking adventure here:

I had every intention of getting up at 8:00...I was going to get ready for church, do some homework, prepare for a meeting, and make some awesome scones to serve at my meeting. Well, both alarms were mysteriously turned off, and I rolled out of bed at 11:00 with bed hair and Alice Cooper eyes, with guests arriving in 1 hour. I'm a fan of the Barefoot (Contessa)- I never actually cook any of her stuff but I watch her show all the time; the night before, I demanded that my mom get out the Barefoot recipe for scones because I had seen her make them on TV and they looked amazing. It was pretty late and she refused to go hunting through her collection of over 1,000 cookbooks (I'm totally not exaggerating) so I had to make do with "Baking-Class Cranberry Cream Scones" a recipe from
They were awesome!! In under an hour I was able to throw these together, and have time to shower while they baked. I'm not nearly as good a cook as my mother; instead of neatly rolling out the dough and using a cup or bowl to cut 4" circles as the instructions said;
I pulled out clumps of dough and flattened them into patties and then cut them in half. Some were huge, some were okay sizes; the huge ones I cut again after they were baked and they turned out fine too.
I also didn't take the time to neatly place them on two baking sheets like I probably should have; I stuffed them all on the same sheet and hoped they wouldn't rise so much that they baked together in the oven.
I was pleasantly surprised to find out that when they did expand and bake together, that lifting them out individually didn't rip them apart or mess them up- this was a very forgiving recipe.

The instructions said to bake them until golden on the edges- the ginormous scones didn't have the pretty golden edges like the others because they took longer to bake. This wasn't much of a problem as I was able to take the fully cooked scones off the baking sheet and put them on the cooling rack and then place the slightly underdone ones back in the oven- like I said, very forgiving recipe.


Baking-Class Cranberry Cream Scones
By Marcy Goldman
3 cups all-purpose flour
2/3 cup sugar
1 teaspoon salt
1 tablespoon baking powder
3/4 cup butter,cut into chunks
2 large eggs
1 teaspoon pure vanilla extract
1/3 to 1/2 cup heavy whipping cream, or more as required
1 1/2 cups frozen cranberries, coarsely chopped (Malaina used half frozen cranberries, and half dried cranberries).
Finishing Touches:
Whipping cream
Sugar, for sprinklng

Preheat oven to 425 ° F. Stack two baking sheets together and line top sheet with parchement paper. Arrange oven rack to upper third position.
In a food processor, add flour, sugar, salt, and baking powder and blend briefly. Add Butter and pulse to make a coarse, grainy mixture. Turn out mixture into a large bowl. ake a well i center and stir in eggs, vanilla, and cream to make a soft but firm dough. Fold in cranberries. Knead by hand briefly on a lightly floured work surface and then pat into a large round. Dough should be about 1 inch thick. Cut into 4 inch circles; then cut these in half. Place on prepared baking sheets. Brush generously with cream and sprinkle on sugar. Bake until scones are lightly browned around the edges, about 15 to 20 minutes.

...Mother says...Malaina took these to her Bishopric and they gobbled the whole thing up.

Monday, November 10, 2008

Get Your Reuben Sandwiches Here!

Did you know there is now a 10th anniversary edition of this amazing book out in print now? I always give new brides a standard cookbook, such as a Better Homes and Gardens or Good Housekeeping book. I also give "The Silver Palate" cookbook since I think it is one of the best cookbooks ever written, and I include a quality piece of kitchen equipment.


Anyway, I wanted to post about the Classic Reuben Sandwich, which is Dave's 2nd favorite sandwich, next to PBJ's. PBJ's are his favorites because he can make them himself without cooking anything on those nights, when I make him eat leftovers. The Reuben is my favorite grilled sandwich, and I usually make them on a Sunday night during half-time. You can usually find them on almost any diner menu too. I find the secret is in the quality of the ingredients, and the number of flips you give the sandwich on the grill.

Mark Bittman gives a recipe for his version of the Reuben on page 268.

Here is mine:
Buttered Dark Rye Bread
Quality Swiss Cheese 2 or 3 slices per sandwich
Pastrami or Corned Beef
Clausen Sauerkraut
Russian or Thousand Island Dressing

Put 2 pieces of bread on the griddle, low heat. Cover them with Swiss cheese. Let it start to melt. Top with heated pastrami or corned beef, heated sauerkraut. Top it with the other piece of bread. Turn up the heat a bit. Watch carefully that it doesn't burn, about 1 more minute. Flip the whole thing one more time, give it another minute and serve with dressing on the side for dipping.

Wednesday, November 05, 2008

Don't You Love a Diner?


My father knows where every single roadside diner is between Salt Lake City and Santa Fe, and Denver and Las Vegas, and probably every other route north bound as well. He can tell you who makes the best biscuits and gravy, pancakes, soup or burger. One of the best meals I ever ate was at a roadside diner somewhere in New Mexico. Fried Eggs and Enchiladas. Any good Mexican-American knows enchiladas are best the next day with fried eggs. Only the menu didn't even say the eggs were coming with enchiladas. It was like this magical, blessed manna from heaven, when my plate was served.

New Mexico/Colorado Mexican food is way different than the California style Mexican food we get at restaraunts here in Utah. I grew up in Denver, so you can guess which style I am partial too. I always have several ziploc bags of roasted Hatch chile's in my freezer, and some sort of tamale, homemade of course. But, that is a subject for another post.

I pulled this book off my library shelves, yesterday and was mightily inspired by some excellent All-American Diner food. I was tempted to make the Onion Rings, the Ruben Sandwich, and of course the Famous Cheesecake. But, when I woke up ravenous after a long evening of election news, I knew I needed food, and I needed it right now!

Western Omelet

4 eggs beaten
1/4 onion, green pepper combined
cubed ham
1/4 cup grated cheese (optional)
1 tablespoon olive oil, or bacon fat if you must.

Preheat the oil or fat in a skillet for one minute. The secret is a hot skillet, then add the cold oil.
Swirl the oil around, put the onion and green pepper and ham in, and saute for a few hot seconds.
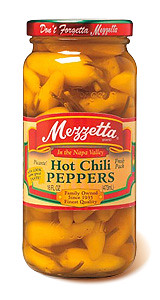
Add the eggs, and after about 30 seconds, start lifting the sides of the cooked egg and let the uncooked egg make contact with the skillet and let them cook. Repeat around the other edges. Add cheese if desired. Roll the omelet onto a plate.Take a potato and run it through the slicer sides of a box grater. Rinse the slices to remove the excess potato starch and pat dry. In a hot skillet with preheated oil, spread out the potato slices and let them cook about 3 minutes on each side. To get the authentic diner flavor you MUST sprinkle with onion salt. Serve with Tabasco or hot pickled peppers.
I go through about 8 jars of these a year. Me, solo, no one else, and can eat about 5 peppers with any given meal.
I used to pack these to Malaysia, I cannot live without them.


Ummm. Comfort food = diner food.
Especially if served on a vintage plate.

Monday, October 13, 2008

Green Tomato Hot Dog Relish

I Refuse to Let Them Die
Last Friday I was aware that we would have a killing frost in Utah. Knowing this was coming, and knowing I would eventually have to say goodbye to my precious babies, I took action. I up rooted all of my plants except one low yielder. Then I hung them upside down in the garage. This crazy action is supposed to send all the energy left in the leaves and stems directly into growing and ripening the remaining fruit. I did have several green fruits that fell off and I collected them all with great intent. Got out my food grinder and got busy.....


Here is what happened to the Green Tomatoes...

Voila... Green Tomato Hot Dog Relish. I guar-ran-darn-tee that you will not be able to tell there are not pickles in this recipe. I have to give my self a great big pat on the back!
Green Tomato Hot Dog Relish ( I doubled this recipe and it yielded 10 - 1/2 pints)
6 cups finely chopped cored green tomatoes (unpeeled)
2 onions, finely chopped
2 green bell peppers, seeded and chopped
1 red bell pepper, seeded and chopped
1/4 cup plus 1 tablespoon kosher salt
1 tsp. whole cloves
1 tsp. celery seeds
1 cinnamon stick,(4 in.) broken in half
2 cups white vinegar
1 1/2 cups lightly packed brown sugar
1 clove garlic
1 Tbsp. dry mustard
1/2 tsp. salt
1/2 tsp. ground ginger

I sent the onions, peppers, and tomatoes through a coarse grind on my food grinder. Drained off the liquid in the tomato mixture and stirred in the 1/4 cup plus 1 Tablespoon of Kosher salt. Set this all in a glass bowl covered it and let it stand for 12 hours. The next morning I poured it into a strainer and rinsed it with cold water and then squeezed out as much of the liquid as I could.

Tie the cloves, celery seeds, and cinnamon stick in a square of cheese cloth, creating a spice bag, or bouquet garni.

In a large Stainless steel pot, combine the vinegar, brown sugar, garlic, mustard, salt, ginger and spice bag. Bring to a boil over medium-high heat, stirring to dissolve sugar. Add drained tomato mixture, stir well and return to a boil. Reduce heat and boil gently, stirring frequently, until tomatoes are transparent, about 1 hour. Discard bouquet garni.

Meanwhile prepare canner, jars, and lids. I quick wash the lids and jars in the dishwasher and leave them in the heat of the dishwasher until needed. I get about 3 inches of water boiling in the canner.

Ladle hot relish into hot jars, leaving 1 centimeter of head space. Remove air bubbles and adjust head space, if necessary by add more hot relish. Wipe the rims, Center lid on jar. Screw band down until resistance is met, then increase to fingertip-tight.

Place the jars in canner, ensuring they are completely covered with water. Bring to a boil and process for 10 minutes. Remove canner lid. Wait 5 minutes, then remove jars, cool and store.

I made some AWESOME Ketchup with the 24 pounds of ripe tomatoes I harvested. 24 pounds condensed into 10 half pint jars. This is really the best thing I have ever preserved, and I will likely make it over and over now that I know how. In case you are wondering what the brown liquid is, it is cider vinegar with a bouquet garni of cinnamon, cloves, celery seed, and allspice. You can leave a comment if you want the recipe for the ketchup.


By the way all of today's recipes are from this simply awesome book. You can click on the picture and it will take you to Amazon where you can read more about it.

ShareThis